The Attic Hatch Isolation: Vertical Thermal Sealing
Stop letting expensive heated air vent straight through your roof. Learn the rigid-foam and compression gasket protocol to permanently break the vertical thermal bridge.
THE RETROFIT
2 min read
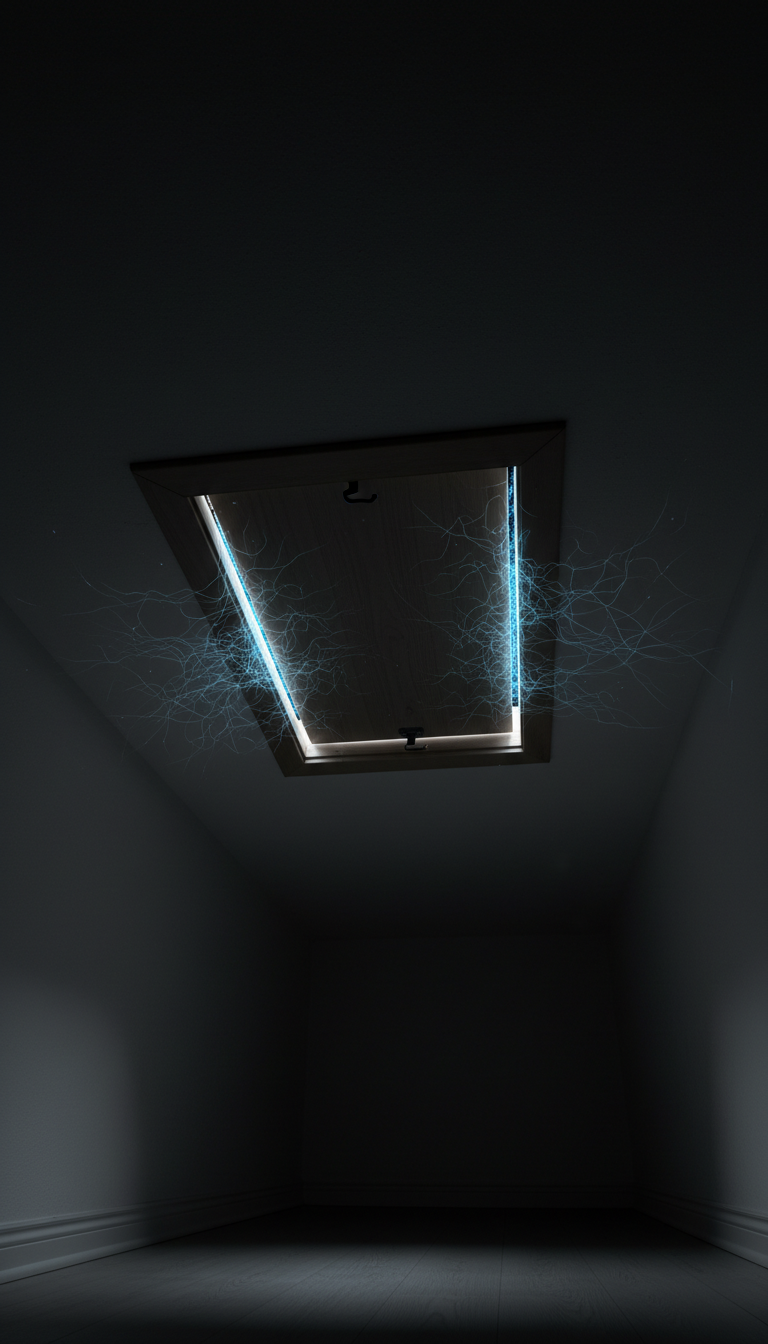
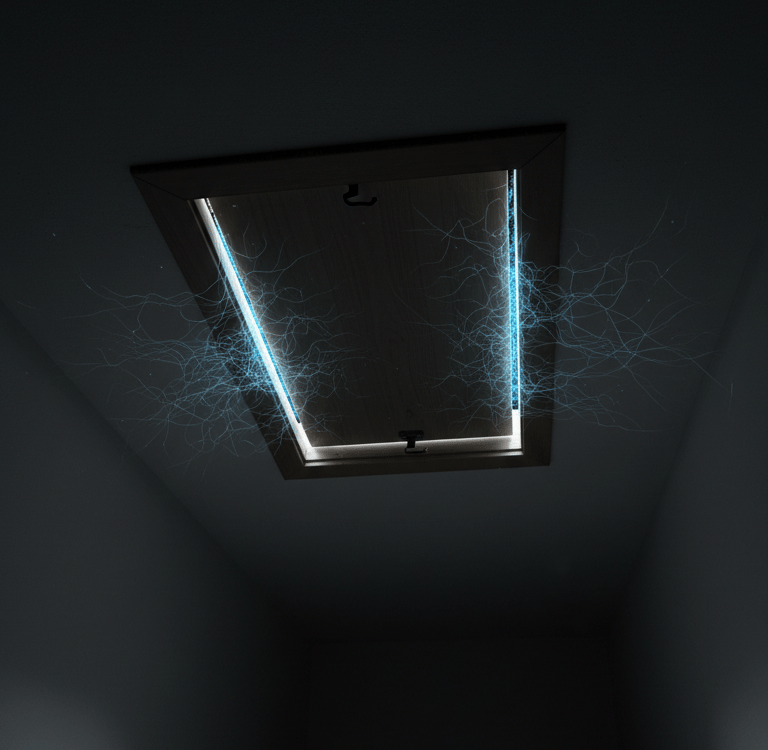
Heat rises. You can seal your basement rim joists and weatherstrip every window on the main floor, but if your upper-level attic access is just a piece of uninsulated drywall resting on a wood frame, your home is acting like a giant chimney. Older construction often ignores this massive vulnerability, allowing expensive heated air to be sucked straight into the freezing attic space. This vertical heat bleed forces your heat pump and furnace to run constantly, driving up utility bills for the entire household. To break this thermal bridge, you must treat the attic hatch like a pressurized air-lock. By executing the Attic Hatch Isolation Protocol—a systematic approach to rigid foam stacking, radiant reflection, and heavy-duty compression gasketing—you can permanently seal the upper thermal envelope.
Phase 1: The Rigid-Foam Thermal Block
A thin piece of drywall offers near-zero R-value (insulation resistance). You need to build a structural thermal block on the hidden side of the hatch.
The Measurement & Cut: Measure the exact interior dimensions of the hatch panel. Using a specialized foam knife, cut three to four layers of 2-inch XPS (extruded polystyrene) rigid foam board to match the footprint.
The Structural Bond: Standard construction adhesive will melt rigid foam. You must use a specialized foam-safe adhesive to bond the XPS layers together, and then bond the entire foam block directly to the top of the drywall hatch.
Phase 2: The Radiant Reflection Layer
Insulation stops conductive heat loss, but you also need to stop radiant heat loss.
The Foil Wrap: Once the foam block is cured, encapsulate the entire top and sides of the XPS block using heavy-duty HVAC foil tape or a dedicated radiant barrier sheet. This highly reflective layer bounces radiant heat back down into the upper level instead of letting it absorb into the attic space.
Phase 3: The Compression Gasket (Air Sealing)
Even with R-20 foam, if the perimeter of the hatch leaks air, the system fails. The hatch must sit on an airtight seal.
The Surface Prep: Clean the wooden lip of the attic frame (where the hatch rests) completely bare. Any dust or old paint chips will compromise the gasket adhesive.
The Gasket Installation: Apply high-density EPDM rubber weatherstripping around the entire perimeter of the wooden frame lip. When the heavy, insulated hatch is dropped back into place, its physical weight will compress the EPDM rubber, creating a 100% airtight mechanical seal that completely stops vertical drafting.
The Expert Gear List
To execute this vertical thermal sealing system, our team utilizes the following professional-grade hardware on Amazon.
Disclosure: The Retrofit is a participant in the Amazon Services LLC Associates Program. As an Amazon Associate, we earn from qualifying purchases at no additional cost to you.
Thermal & Radiant Blocking
Loctite PL 300 Foam-Safe Construction Adhesive: A specialized, high-grab adhesive engineered specifically to bond XPS rigid foam panels without melting or compromising the polystyrene structure.
3M 3340 Foil HVAC Tape: The undisputed industry standard for thermal encapsulation. This extreme-temperature, 4.0 mil thick aluminum foil tape provides a permanent, highly reflective radiant barrier to bounce heat back into the living space without peeling under high attic heat.
Cutting & Air Sealing
RoMech Foam Cutter (Hot Knife): Standard utility knives leave jagged, messy edges on thick XPS foam. This thermal hot knife slices through 2-inch foam board like butter, ensuring perfectly square, factory-grade cuts for an exact fit.
Frost King EPDM Cellular Rubber Weatherstripping: Standard open-cell foam compresses and fails over time. This high-density EPDM rubber acts as a heavy-duty compression gasket, completely blocking perimeter drafts when the hatch rests upon it.
Contact
Questions? Reach out anytime, we’re here.
© 2026. All rights reserved.
Disclosure
The Retrofit Routine is a participant in the Amazon Services LLC Associates Program. As an Amazon Associate, we earn from qualifying purchases at no additional cost to you.
The Retrofit Routine is a digital property owned and operated by Atlantic Delivery Drivers Corp.