The Driveway Restoration Protocol: Crack Repair & Concrete Sealing Before Summer
A full driveway replacement costs $4,000 to $8,000. The materials to prevent it cost under $300. Get the exact crack filler, surface prep, and penetrating sealer protocol to permanently repair winter damage and lock down your concrete before summer heat and UV exposure turns hairline cracks into structural failures.
THE RETROFIT
6 min read

Pressure washing your driveway reveals the full extent of what winter did to it - The Exterior Envelope Decontamination: Downstream Soft-Wash Protocol. The biological growth is gone, but what remains is worse — a network of hairline cracks, spalled surface patches, and porous concrete that is now fully exposed to the next six months of UV radiation, thermal cycling, and vehicle load. Left unsealed through a summer season, those hairline cracks absorb water, expand under heat, and become structural fractures by the following spring. A full driveway replacement costs between $4,000 and $8,000 depending on size and regional labour rates. The materials required to prevent that replacement — a professional crack filler, a penetrating silane-siloxane sealer, and the application hardware — cost under $300 and require one afternoon of work. That is the return on investment this protocol delivers.
Most homeowners treat driveway maintenance as a cosmetic issue. It is not. Concrete is a porous material that wicks moisture, absorbs road salts, and degrades from the inside out when its surface is left unprotected. A penetrating concrete sealer does not sit on top of the surface like a coating — it chemically bonds with the concrete matrix and fills the pores from within, creating a permanent barrier against moisture infiltration, freeze-thaw cycling, and UV surface degradation.
This guide is the exact two-phase protocol for repairing winter crack damage and deploying a professional-grade penetrating sealer on a residential driveway before the summer season begins.
Phase 1: The Crack Remediation Protocol — Structural Surface Repair
Sealing over unfilled cracks is the most common and most expensive driveway maintenance mistake. A penetrating sealer will fill microscopic surface pores but it will not bridge a structural crack. Any crack wider than a hairline must be mechanically filled and cured before any sealer is applied — otherwise the sealer locks moisture into the crack rather than keeping it out, accelerating the freeze-thaw damage it was meant to prevent.
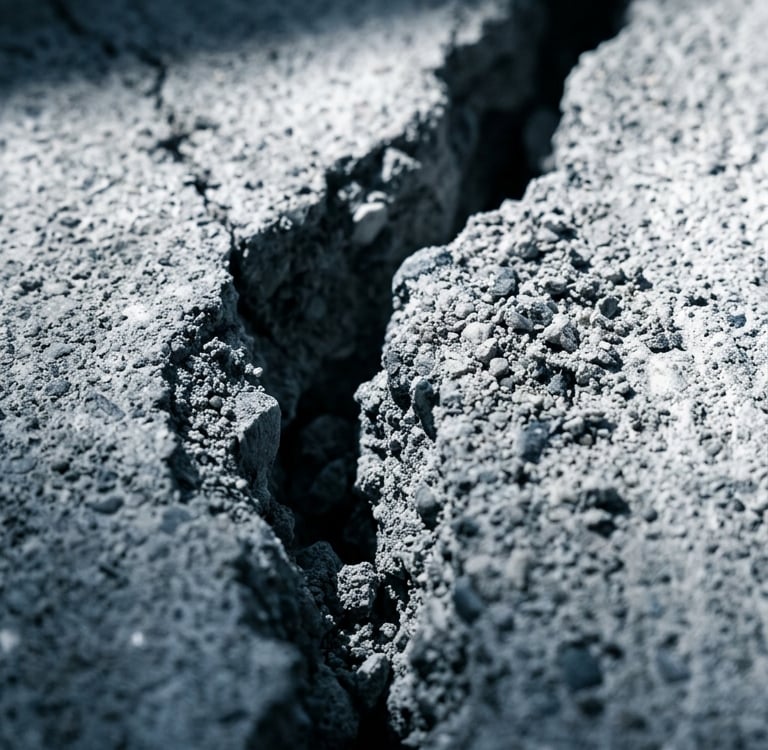
The Crack Audit: Before purchasing any repair material, walk the entire driveway surface and classify every crack by width. Hairline cracks — cracks narrower than 1/8 inch that you cannot fit a coin edge into — are surface cracks that the sealer will address. Cracks wider than 1/8 inch are structural cracks that require a dedicated crack filler before sealing. Mark every structural crack with chalk so none are missed during the repair phase.
The Surface Preparation: Crack filler will not bond to a surface contaminated with algae residue, road oil, or loose concrete debris. If you have already executed the soft-wash decontamination protocol, your surface is clean and ready. If not, the surface must be degreased and rinsed before any repair material is applied. Any loose concrete along the crack edges must be removed with a wire brush or chisel before filling — loose material under the filler creates a false bond that fails within one season.
The Crack Filler Deployment: For cracks between 1/8 and 1/2 inch wide, deploy a self-leveling polyurethane concrete crack filler directly into the crack from the bottle applicator. The self-leveling formula flows into the crack under its own weight, filling the full depth of the crack without requiring tooling or finishing. Overfill each crack slightly — the filler will settle as it flows into the crack depth. For cracks wider than 1/2 inch, pack the crack with dry sand to within 1/4 inch of the surface before applying the filler. This prevents excessive material consumption and ensures the filler cures at the correct depth for structural integrity.
The Cure Window: Polyurethane crack filler requires a minimum of 4 hours of cure time before any sealer can be applied over it. Full structural cure requires 24 hours. Do not attempt to accelerate the cure by applying heat. The driveway surface must also be completely dry — any residual moisture from the cleaning phase or recent rain will prevent both the crack filler and the sealer from bonding correctly. A minimum of 48 hours of dry weather is required before executing this protocol.
The Feather Edge: Once the crack filler has fully cured, run a stiff putty knife or scraper across the filled crack to shave any excess filler flush with the surrounding concrete surface. A raised filler edge will be visible under the sealer and creates a trip hazard at the crack location. The filled surface should be completely flush and smooth before the sealing phase begins.
Phase 2: The Penetrating Sealer Deployment — Surface Hardening & Protection
A penetrating silane-siloxane sealer is a chemically reactive compound — not a surface coating. When applied to clean, dry concrete it penetrates 2 to 4 inches into the surface and reacts with the calcium silicate in the concrete matrix to form a crystalline hydrophobic barrier within the pores. This reaction is permanent. Unlike film-forming acrylic sealers that sit on the surface and peel under UV exposure and vehicle traffic, a penetrating sealer cannot peel because it has become part of the concrete structure itself.
The Application Window: Penetrating sealers have strict environmental requirements that must be met for the chemical reaction to complete correctly. The surface and air temperature must be above 50°F and below 90°F at the time of application. The concrete must be completely dry — no rain in the previous 48 hours and none forecast for the following 24 hours. Direct sunlight during application accelerates the evaporation of the carrier solvent before it can penetrate the surface. Apply in the early morning or on an overcast day for optimal penetration depth.
The Pre-Application Sweep: Immediately before applying the sealer, blow or sweep the entire driveway surface to remove any dust, pollen, or debris that has settled since the cleaning phase. Any particulate matter on the surface will be sealed into the concrete permanently once the sealer is applied. A leaf blower is the fastest method for a full residential driveway.
The Sealer Application: Pour the penetrating sealer into a pump garden sprayer. Do not use a roller or brush for initial application — a sprayer applies the sealer at a uniform rate across the surface and allows it to flood the pores rather than being mechanically worked into them. Apply the sealer in overlapping passes from one end of the driveway to the other, working in sections of approximately 4 to 6 feet wide. The surface should appear visibly wet with sealer but not pooled — any pooling indicates the concrete is already saturated in that section. Use a long-handled squeegee to spread any pooled sealer into adjacent dry areas before it begins to tack.
The Back-Brush Pass: Immediately after the spray application, follow with a stiff-bristle push broom to work the sealer into the surface texture of the concrete. This back-brush pass forces the sealer into any surface texture variations that the spray pass may have bridged over rather than penetrated. It also distributes any light pooling evenly and eliminates the streaky, uneven coverage that is common when penetrating sealers are applied by spray alone.
The Second Coat: A single coat of penetrating sealer provides adequate protection for smooth or moderately porous concrete. For older, highly porous concrete or any surface with significant spalling, a second coat applied 30 to 60 minutes after the first coat — while the first coat is still tacky — doubles the penetration depth and provides significantly enhanced long-term protection. Apply the second coat in the opposite direction to the first to ensure cross-coverage across all surface texture orientations.
The Cure & Traffic Protocol: A penetrating sealer is dry to the touch within 2 to 4 hours but requires 24 hours before foot traffic and 72 hours before vehicle traffic. Do not allow vehicles onto the freshly sealed surface before the 72-hour cure window is complete — tire contact during the cure phase can permanently mark the sealer with tire impressions. The hydrophobic effect will be immediately visible after cure — water will bead and sheet off the sealed surface rather than absorbing into the concrete.
The Expert Gear List
To execute this complete driveway restoration protocol, our team deploys the following professional-grade materials. All items are available on Amazon.
Disclosure: The Retrofit Routine is a participant in the Amazon Services LLC Associates Program. As an Amazon Associate, we earn from qualifying purchases at no additional cost to you.
Crack Repair
Sikaflex Self-Leveling Sealant: A professional-grade, self-leveling polyurethane crack filler engineered for horizontal concrete surfaces. The self-leveling formula flows into cracks under its own weight, filling the full depth without tooling. Cures to a flexible, traffic-ready seal that moves with the concrete through seasonal expansion and contraction without re-cracking — the critical performance advantage over rigid cement-based fillers that crack again within one season.
Hyde Tools Stiff Putty Knife: The mandatory finishing tool for shaving cured crack filler flush with the surrounding concrete surface. A rigid stainless steel blade that holds its edge under the scraping pressure required to feather the filler edge without gouging the surrounding concrete.
Surface Sealing
Foundation Armor SX5000 Penetrating Concrete Sealer: A professional-grade silane-siloxane penetrating sealer that chemically reacts with the concrete matrix to form a permanent internal hydrophobic barrier. Does not alter the surface appearance, cannot peel or flake, and protects against moisture infiltration, freeze-thaw spalling, road salt damage, and UV surface degradation. One gallon covers 100 to 200 square feet depending on concrete porosity — sufficient for a standard two-car residential driveway.
Sprayers Plus Concrete Pro Compression Sprayer, 2-Gallon: A purpose-built compression sprayer with Viton chemical-resistant seals and adjustable brass fan nozzle tips engineered specifically for concrete applications including penetrating sealers. The 2-gallon capacity covers a full standard driveway without refilling, and the wide 5-inch mouth opening allows for fast filling and easy cleaning after application. The chemical-resistant hose and pressure relief valve make it safe and reliable for repeated use with solvent and water-based sealing compounds.
Bon Tool Concrete Push Broom: A stiff-bristle, wide-head push broom for the back-brush pass that works the penetrating sealer into the concrete surface texture immediately after spray application. The wide head covers a standard driveway lane width in a single pass, minimizing application time before the sealer begins to tack.
Contact
Questions? Reach out anytime, we’re here.
© 2026. All rights reserved.
Disclosure
The Retrofit Routine is a participant in the Amazon Services LLC Associates Program. As an Amazon Associate, we earn from qualifying purchases at no additional cost to you.
The Retrofit Routine is a digital property owned and operated by Atlantic Delivery Drivers Corp.