The Hard Surface Reset: Dashboard, Vent & Trim Decontamination Protocol
Wiping your dashboard with an all-purpose spray and a paper towel isn't detailing — it's smearing. Get the exact mechanical brush, chemical agitation, and UV protection protocol to strip embedded dust, skin oils, and winter film from every hard surface in your cabin.
THE DETAIL
7 min read
Your vehicle's fabric and carpet get all the attention, but the hard surfaces in your cabin are accumulating their own layer of bonded contamination that a standard wipe-down will never remove. Over a full winter season, a combination of skin oils from daily contact, dust particles that have electrostatically bonded to plastic trim, off-gassing from the dashboard vinyl, and a fine film of road dust that infiltrates through the HVAC system coats every hard surface in the interior. The AC vents are caked with compacted dust that recirculates back into your air every time the system runs. The piano-black trim around your infotainment screen is covered in micro-scratches from paper towels and rough rags. The interior glass has a hazy film of outgassed plasticizers on every surface that causes severe glare at night.
None of this gets fixed with a spray bottle and a wipe. It requires a systematic, phase-by-phase mechanical and chemical approach targeting each surface type with the correct tool and chemistry. This guide is the exact hard surface decontamination protocol our team uses to restore a cabin to factory-fresh condition.
Phase 1: The Dry Dislodgement — Mechanical Dust Extraction
The single most common interior detailing mistake is introducing any liquid chemistry before the dry particulate has been fully removed from the surface. Spraying a cleaner onto a dusty dashboard simply turns the dust into a paste that smears into the texture of the plastic and becomes significantly harder to remove. Every liquid phase of this protocol must be preceded by a complete dry extraction.
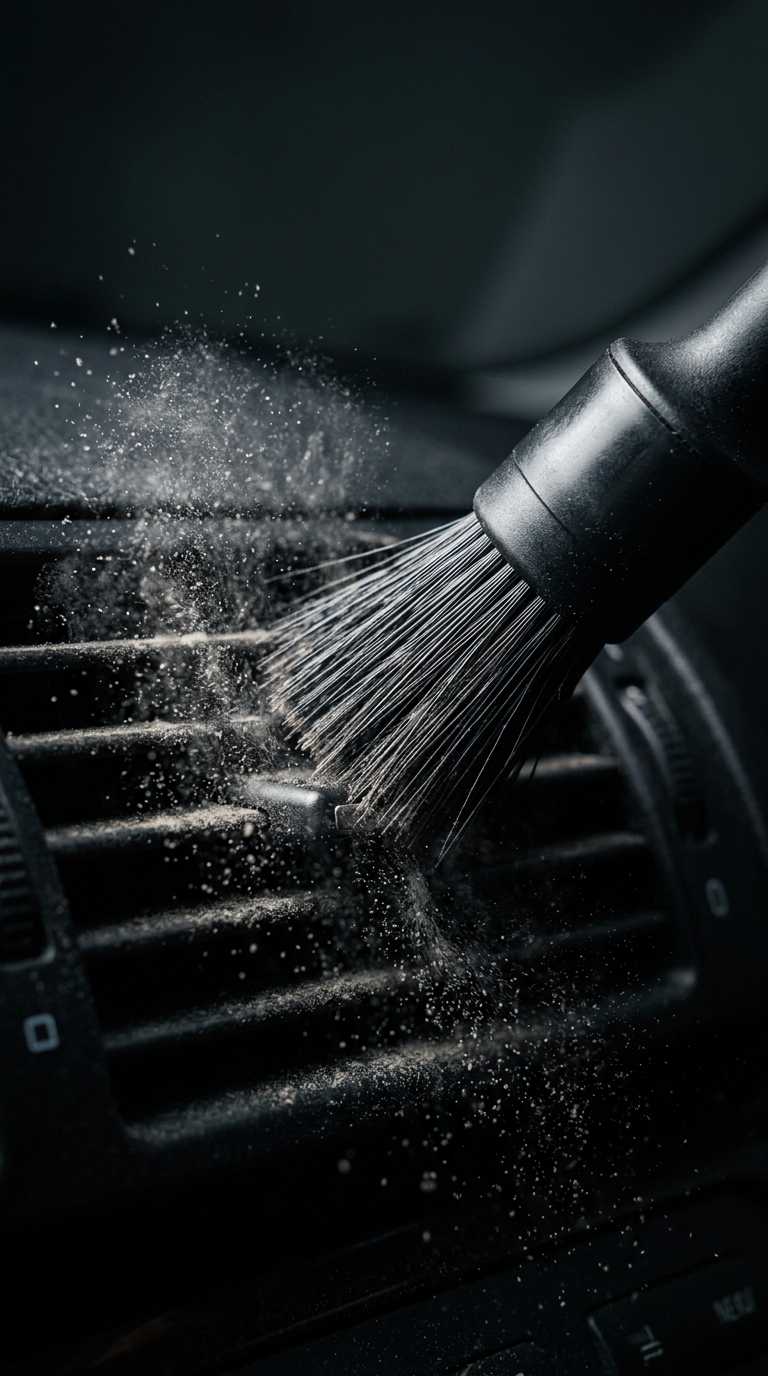
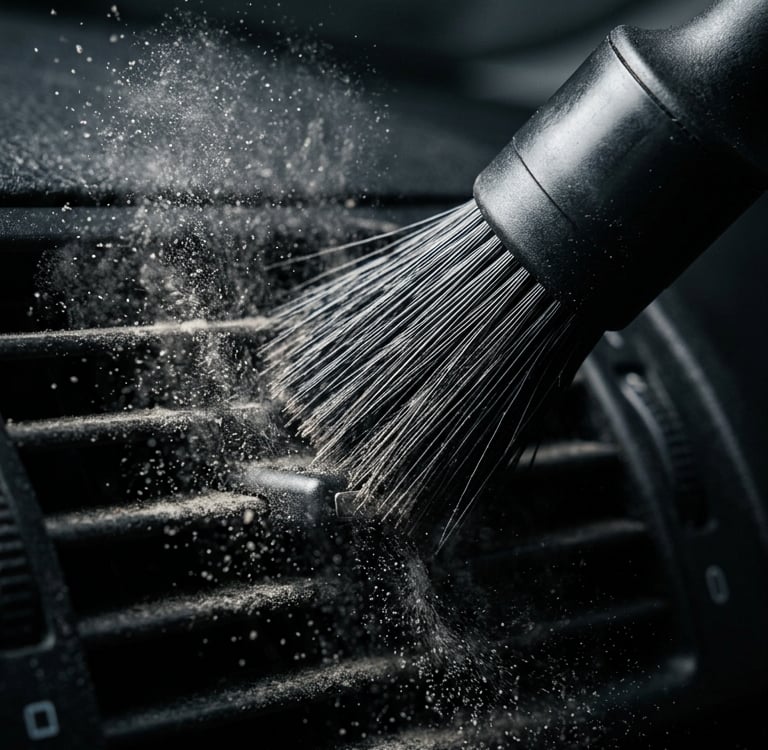
The Vent Decontamination: AC vents are the most neglected surface in any vehicle interior and the most impactful to clean. Compressed dust buildup inside the vent slats recirculates directly into the cabin air every time the system runs. Using a dedicated detailing brush with medium-stiffness bristles, work systematically through each vent slat from top to bottom with short, flicking strokes that dislodge the compacted dust column rather than pushing it deeper. Follow immediately with a quick vacuum pass using a crevice tool to capture the dislodged debris before it resettles.
The Dashboard & Trim Sweep: Before any chemical is applied to the dashboard, door panels, or center console, perform a complete dry brush sweep of all surfaces using a soft-bristle detailing brush. Work from the top of the dashboard downward so that dislodged dust falls to lower surfaces and ultimately to the floor mats where it can be vacuumed. Pay particular attention to the recessed areas around buttons, dial bases, speaker grilles, and trim panel gaps where dust compacts into a visible dark crust over time.
The Crevice Vacuum: After the brush sweep, run a vacuum with a crevice attachment along every seam, gap, and recess in the dashboard and door panels. The gap between the dashboard and the windshield, the recesses around the gear selector, and the channels along the door card trim all accumulate debris that the brush pass dislodges but cannot remove. This step must be completed before any liquid is introduced to the cabin.
Phase 2: Chemical Agitation — Hard Surface Decontamination
With all dry particulate removed, you can now target the bonded contamination that remains on each surface type. Hard interior surfaces require different chemical treatments based on their material composition — what works on textured plastic trim will damage piano-black gloss panels, and what cleans vinyl can strip leather conditioning.
The Textured Plastic Protocol: Spray a diluted all-purpose cleaner (APC) at a 4:1 ratio onto a detailing brush — not directly onto the surface. Agitate the textured plastic of the dashboard, door panels, and center console with the damp brush using short circular motions. The brush bristles force the chemistry into the texture grain of the plastic, breaking the bond between the surface and the compacted skin oils and dust film. Wipe immediately with a clean microfiber towel before the solution dries on the surface.
The Piano-Black & Gloss Trim Protocol: Never use a brush or any chemical agitation on gloss piano-black trim. This surface is a micro-scratch magnet — even soft bristles will induce visible swirl marks on a high-gloss panel. Instead, spray a small amount of interior detailer directly onto a folded microfiber towel and use light, straight-line passes with zero pressure. The goal is chemical dissolution of the surface film, not mechanical agitation. One pass per section, flip the towel to a clean face for each wipe.
The Leather & Vinyl Cleaning Phase: Leather and vinyl surfaces require a dedicated pH-balanced leather cleaner rather than an APC, which can strip the protective coating from genuine leather over time. Apply the leather cleaner to a soft applicator brush and work it into the surface using gentle circular motions on seats and straight passes on the steering wheel and gear selector. The steering wheel and gear selector are the highest-contact, highest-contamination surfaces in the vehicle — they accumulate skin oils and bacteria at a rate that makes dedicated cleaning a functional maintenance step, not just cosmetic. Wipe clean with a microfiber towel.
The Interior Glass Decontamination: The interior glass film is one of the most overlooked contamination issues in any vehicle cabin. The hazy, greasy film that builds on the interior windshield and side windows is composed of outgassed plasticizers from the dashboard and interior trim that vaporize in heat and deposit on the cooler glass surface. Standard glass cleaners smear this film rather than dissolving it. Use a dedicated automotive interior glass cleaner applied to a clean microfiber towel — never sprayed directly onto the glass as overspray on surrounding trim is difficult to remove. Work in straight overlapping passes, flipping the towel constantly. Use a second dry towel for the final streak-free wipe. Buff with a final clean face in an X-pattern to catch any remaining streaks.
Phase 3: Surface Protection — UV Armor & Anti-Static Sealing
Cleaning the hard surfaces is only half the protocol. Without applying a protective barrier, the fresh plastics will immediately begin accumulating a new static charge that attracts dust back to the surface within days. UV exposure through the windshield and side glass also begins degrading unprotected dashboard plastic and vinyl almost immediately, causing the chalky, cracked surface texture common in aging vehicles.
The UV Protectant Application: Apply a water-based, UV-blocking interior protectant to a microfiber applicator pad — never spray it directly onto the dashboard. Direct spray causes overspray on interior glass and in vent openings, which is extremely difficult to remove from glass and leaves a residue inside the HVAC system. Work the protectant into the textured plastic surfaces using overlapping circular motions, then follow immediately with a clean, dry edgeless microfiber towel to level the product and remove any excess. The finish should be completely matte and dry to the touch. Any remaining shine or tackiness indicates excess product that must be buffed off — a greasy protectant layer attracts dust and causes windshield glare.
The Leather Conditioning Phase: After cleaning, genuine leather requires a conditioner to restore the moisture and flexibility that the cleaning process removes. Apply a dedicated leather conditioner to a foam applicator pad and work it into the leather surfaces using gentle circular motions. Allow it to absorb for 2 to 3 minutes before buffing off the excess with a clean microfiber towel. Conditioned leather resists cracking and maintains its surface integrity significantly longer than untreated leather, particularly in vehicles exposed to high UV and temperature cycling.
The Anti-Static Barrier: The UV protectant applied to the plastic trim surfaces also deposits an anti-static barrier that disrupts the electrostatic charge that attracts airborne dust particles back to the dashboard surface. A properly applied and leveled protectant will keep the dashboard noticeably cleaner for significantly longer between full decontamination sessions, reducing your maintenance burden between details.
The Expert Gear List
To execute this complete hard surface decontamination protocol, our team deploys the following professional-grade tools and chemistry. All items are available on Amazon.
Disclosure: The Retrofit Routine is a participant in the Amazon Services LLC Associates Program. As an Amazon Associate, we earn from qualifying purchases at no additional cost to you.
Mechanical Agitation
Nurkul Detailing Brush Set, 11-Piece: A complete set of soft and medium-bristle detailing brushes in multiple sizes covering every hard surface geometry in the cabin — wide flat brushes for dashboard sweeping, narrow pointed brushes for vent slat decontamination, and small round brushes for button recesses and speaker grilles. Having the right brush size for each surface prevents the temptation of using a single oversized brush that cannot reach tight areas effectively.
Chemical Decontamination
Slick Products All-Purpose Surface Cleaner: The mandatory chemical extraction agent for interior hard surfaces. Instead of messing with complicated dilution ratios, this ready-to-use spray instantly lifts embedded dirt, skin oils, and grease from dashboards, door panels, textured plastic, and vinyl. It safely breaks the bond between the surface and the accumulated winter dust film without damaging delicate surrounding trim. It leaves behind a perfectly clean baseline and a fresh lemon scent, preparing the panels for your final interior conditioner
Slick Products Streak-Free Glass Cleaner: A dedicated, ammonia-free automotive glass formula engineered to dissolve the outgassed plasticizer film and oily smudges that standard household cleaners simply smear. It is completely safe on aftermarket interior window tints, chrome trim, and mirrors. Delivered in a ready-to-use trigger spray with a blue agave scent, it leaves a streak-free optical finish that is mandatory for eliminating blinding night-driving glare caused by interior windshield buildup.
Surface Protection
Slick Products Multi-Surface Interior Conditioner: A professional-grade, non-greasy formula engineered to simultaneously clean and condition vinyl, plastic, and leather. It safely lifts residual dust and fingerprints while leaving a dry, OEM-style finish that makes the cabin look naturally refreshed, rather than coated in a cheap silicone shine. It protects dashboards, door panels, and center consoles while restoring a factory "new car" scent to the interior.
Slick Products Multi-Surface Exterior Dressing: The final finishing step for all exterior vinyl, rubber, and plastic components. This non-greasy spray formula is engineered to restore a silky, like-new luster to tires, bumpers, and trim without leaving a sticky residue that attracts road dust. It provides a protective barrier against UV fading while imparting a fresh grape scent. It is the required tool for ensuring that high-wear areas like plastic fenders and door seals look as refined as the rest of the vehicle’s hard surfaces.
Mighty Cleaner Edgeless Microfiber Towels (6-Pack): The specialized precision standard for interior surface work and delicate finishing. These edgeless, scratch-free towels are conveniently sized at 12”x12”, providing superior control in tight spaces like center consoles, gauge clusters, and infotainment screens where bulky standard towels are too clumsy. The seamless construction eliminates the risk of edge-induced scratching on piano-black trim and gloss interior panels, making them the required tool for the final buffing of interior conditioners and glass cleaners.
Contact
Questions? Reach out anytime, we’re here.
© 2026. All rights reserved.
Disclosure
The Retrofit Routine is a participant in the Amazon Services LLC Associates Program. As an Amazon Associate, we earn from qualifying purchases at no additional cost to you.
The Retrofit Routine is a digital property owned and operated by Atlantic Delivery Drivers Corp.