The Spring Decontamination Protocol: Stripping 4 Months of Winter Salt, Sand & Road Film
Your car wash isn't removing winter damage — it's smearing it. Get the exact three-phase chemical and mechanical protocol to fully strip bonded salt, iron fallout, and road film from your vehicle's paint before spring driving season begins.
THE DETAIL
7 min read
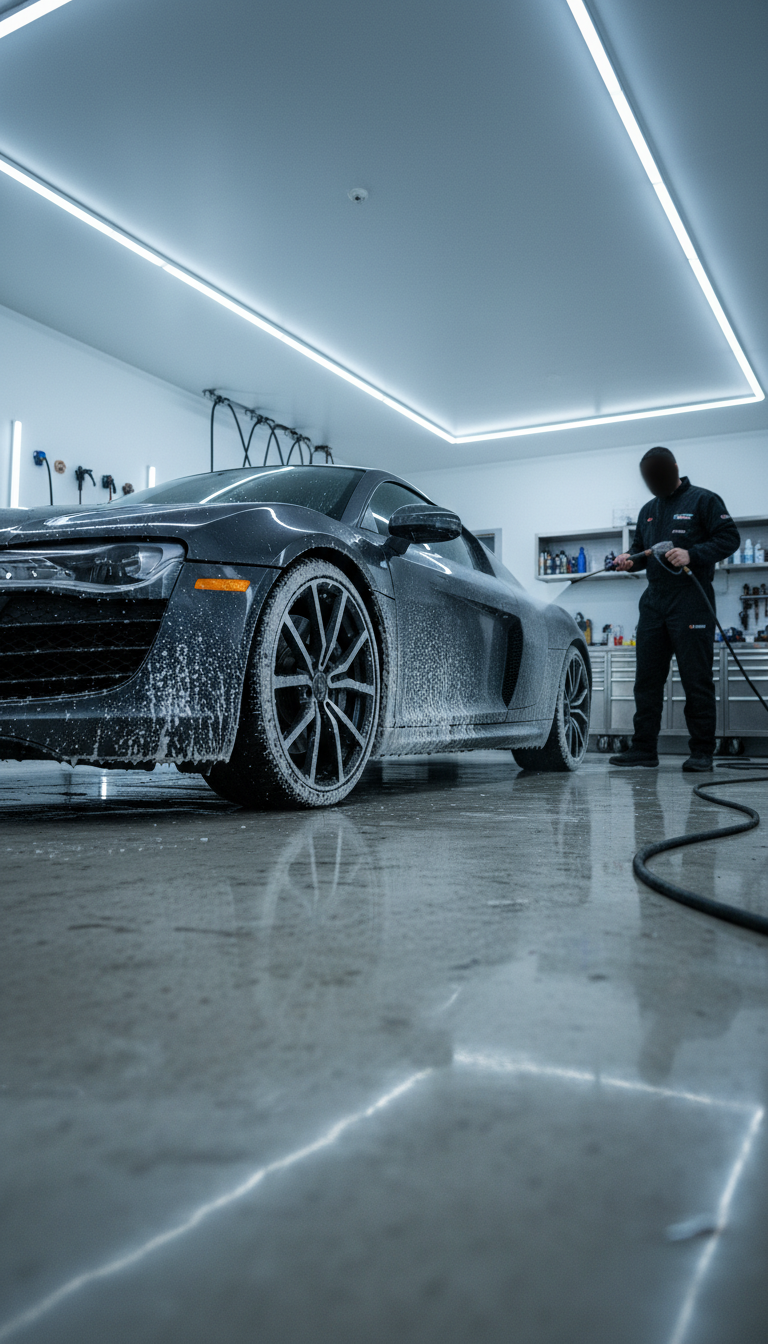
Every winter, your vehicle absorbs a sustained chemical assault. Calcium chloride road salt crystallizes in the door jambs and wheel wells. Iron particles from brake dust physically embed into the pores of your clear coat. A film of combustion exhaust, road spray, and oxidized rubber bonds to every panel on the car.
A standard car wash does not remove any of this. It smears it.
By the time spring arrives, you are not dealing with surface dirt — you are dealing with bonded contamination that is actively degrading your paint finish. Left untreated through another season, this contamination accelerates clear coat oxidation, promotes rust initiation at panel edges, and permanently dulls the gloss. This guide is the exact three-phase protocol required to strip your vehicle's exterior down to a factory-clean baseline before the spring and summer driving season.
Phase 1: The Chemical Strip — Iron Fallout Removal & Pre-Soak Deployment
Most DIY detailers go straight for the hose. That is the single most expensive mistake in the process. Before any water touches the vehicle, you must deploy chemistry to dissolve and suspend the contamination that has bonded to the surface over the winter. Rinsing first without this step simply redistributes abrasive particles across the paint, inducing micro-scratches in the clear coat on every wash. You do not need an expensive commercial pressure washer to execute this critical pre-soak. Utilizing a high-yield foam gun attached directly to a standard residential hose allows you to lay a thick, clinging blanket of heavy-duty wash shampoo over the entire vehicle. Let it dwell for 3 to 5 minutes to break the static bond before you proceed to the initial rinse.
The Iron Fallout Neutralization: Working on a cool, dry vehicle and out of direct sunlight, spray an iron fallout remover liberally across all painted panels, wheels, and wheel wells. Within 60 to 90 seconds you will observe a purple or red bleeding reaction — this is the iron chelating agents actively dissolving ferrous particles that have physically embedded into your clear coat over four months of winter driving. Allow a full 3-minute dwell time. Do not let it dry on the surface. This single step removes contamination that no amount of soap and water will ever touch.
The Tar & Adhesive Eradication: While the iron remover is dwelling, deploy a tar and adhesive remover to the lower rocker panels, rear bumper, and door sills — the primary impact zones for asphalt tar spots and road spray adhesion. Spray on, wait 2 minutes, and wipe with a dedicated microfiber towel. Never reuse that towel on painted surfaces — tar dissolvers carry embedded asphalt that will scratch.
The Pre-Soak: After rinsing the iron remover completely, load your foam cannon with pH-neutral car wash soap at a heavy dilution as a pre-soak pass. The goal here is not cleaning — it is lubrication. You are encapsulating remaining loose particulate in a slippery chemical barrier so the contact wash phase does not drag grit across the clear coat. Allow 3 minutes of dwell time before rinsing.
Phase 2: Surface Decontamination — Clay Bar Lubrication & the Contamination Audit
Even after a full chemical strip, your paint is not clean. Run your hand across the hood after a thorough wash and you will feel a rough, sandpaper-like texture. That is bonded contamination — microscopic ferrous and mineral particles that survived the chemical phase and sit embedded above the surface of the clear coat. The clay bar is the only tool capable of shearing these contaminants off the surface without abrasion.
The Contamination Audit: Before clay barring, perform a quick audit. Place your hand inside a thin plastic bag and run your fingertips across a clean, dry panel. The plastic amplifies surface texture and exposes roughness that is invisible to the naked eye. Any gritty or pebbly sensation confirms bonded contamination. Run this test on the hood, roof, and trunk lid and note your highest-contamination zones — these panels will require extra clay bar passes.
The Clay Bar Protocol: Never use a clay bar on a dry surface. Spray the section generously with a dedicated clay lubricant or a heavy misting of detail spray. Knead the clay bar flat into a palm-sized disc and work one 2x2 foot section at a time using light, overlapping straight-line passes — never circular motions. After 4 to 5 passes per section, fold the clay to expose a clean face and continue. You will feel the clay glide progressively smoother as contamination is removed. That tactile change is your confirmation the section is complete.
The Drop Protocol: If you drop the clay bar, discard it immediately. A clay bar that contacts concrete picks up abrasive grit that will permanently scratch your clear coat on the next pass. A replacement bar costs $10. A paint correction to fix clay bar marring costs $300.
The IPA Wipe-Down: After completing each panel, wipe it down with a 70% isopropyl alcohol solution diluted 1:1 with distilled water. This strips all residual clay lubricant, detail spray oils, and surface plasticizers from the paint. This step is mandatory before sealant application — any oils left on the surface will prevent the sealant from bonding correctly and will cause streaking and premature failure.
Phase 3: The Seal — Sealant Deployment & Hydrophobic Lockdown
At this point your paint is at factory-clean baseline. Fully decontaminated, clay-bar smooth, and IPA-stripped. Every panel is a chemically clean substrate, meaning your sealant will bond directly to the clear coat rather than sitting on top of a layer of residual oils. This is the only condition under which a paint sealant achieves its rated protection lifespan.
The Sealant Application: The most efficient method for a full exterior decontamination is deploying a spray sealant as a drying aid while the panels are still wet from the final rinse. Spray the sealant lightly across one wet panel at a time, then dry. The sealant bonds to the clean clear coat as the water is pulled off, providing hydrophobic protection and deep gloss in a single step.
Flash Time & Environmental Controls: If applying a dedicated liquid sealant with a foam applicator instead, allow the product to flash — the point at which the liquid carrier evaporates and the product hazes slightly over the panel. This typically takes 2 to 5 minutes in spring temperatures. Do not buff before the product has fully flashed. Buffing early removes the sealant entirely rather than leveling it. Always work in the shade or indoors — direct sunlight causes unpredictable flash times and high-spot streaking.
The Final Buff: Using a clean, dry, high-GSM microfiber towel, perform a single light buffing pass to level the sealant and remove the haze. Flip to a dry face for the final wipe. The surface should exhibit deep gloss and pass the bag test with zero roughness. Any remaining texture indicates an incomplete clay bar pass on that panel.
The Door Jamb Execution: Finish the protocol by targeting the door jambs, trunk lip, and hood channels — the primary accumulation zones for winter salt crystallization that most DIY details skip entirely. Spray an all-purpose cleaner diluted 4:1 into the jambs, agitate with a detailing brush, and wipe clean. Apply a light coat of spray sealant to the painted jamb surfaces and wipe immediately. These zones trap moisture year-round and unsealed jamb paint is the first corrosion initiation point on any aging vehicle.
The Expert Gear List
To execute this complete spring decontamination protocol, our team deploys the following professional-grade chemistry and hardware. All items are available on Amazon.
Disclosure: The Retrofit Routine is a participant in the Amazon Services LLC Associates Program. As an Amazon Associate, we earn from qualifying purchases at no additional cost to you.
Chemical Decontamination
Iron X Iron Remover by CarPro: The professional standard for ferrous fallout decontamination. The color-change reaction confirms the chemistry is actively working. Safe on all painted surfaces, glass, and wheels.
Slick Products Heavy-Duty Cleaner & Degreaser: The mandatory chemical extraction agent for tires, wheel barrels, and heavily soiled lower panels. Standard car wash soap cannot dissolve baked-on brake dust or road grease. This professional-strength, citrus-based formula cuts through heavy oil and grime on contact. It can be deployed at full strength to reset neglected tires, engine bays, and exhaust tips, or diluted for lighter maintenance washes. It perfectly pairs with your wheel brush to safely lift heavy buildup and create a clean baseline before you apply any tire dressings
Clay Bar & Surface Prep
Chemical GuysvClay Bar and Luber Synthetic Lubricant Kit: A light/medium duty clay bar paired with the dedicated synthetic lubricant in a single kit. The clay has enough bite to remove bonded winter contamination from paint, glass, and metal, and the included Luber spray provides the mandatory lubrication layer for safe clay bar use. Buying the kit also means you have a backup bar on hand — critical for following the drop protocol without stopping the job.
Wash Hardware
Slick Products Garden Hose Foam Gun Wash Bundle: A complete high-yield foam delivery system and 64 ounces of super-concentrated wash in a single kit. You do not need a commercial pressure washer to execute a professional pre-soak—this gun attaches directly to a standard residential garden hose to generate a thick, clinging foam blanket that achieves maximum dwell time. Select the Off-Road Wash formula to safely strip heavy winter salt and mud, or choose the Wash & Wax formulation to maintain a high-gloss, streak-free finish on your daily driver. Buying the bundle provides enough heavy-duty concentrate for a full season of decontamination passes.
Slick Products Pressure Washer Foam Cannon Bundle: The heavy-duty pre-soak upgrade for anyone utilizing a gas or electric pressure washer. This complete bundle pairs a durable brass-fitting foam cannon with 64 ounces of super-concentrated wash, atomizing the chemistry into a dense, shaving-cream-thick foam. Select the Off-Road Wash to aggressively melt heavy mud and winter grime, or choose the Wash & Wax formulation to maintain a high-gloss, streak-free finish on your daily driver. Buying the bundle provides enough heavy-duty concentrate for a full season of aggressive pre-soak extraction.
Sealant & Finishing
P&S Bead Maker Paint Protectant: The most efficient sealant for a full decontamination day. Applied as a drying aid to a freshly prepped and IPA-wiped surface, it bonds directly to the clean clear coat and delivers a high-gloss hydrophobic barrier in a single pass.
Carfidant Trim & Plastic Restorer: The professional-grade solution for exterior trim that has transitioned from black to a faded, oxidized grey. Unlike standard dressings that sit on the surface, this restorer penetrates the pores of faded vinyl, rubber, and plastic to revive the original deep black look in minutes. It creates a long-lasting, water-resistant UV barrier that protects against future sun damage and weathering. Use this specifically on sun-bleached wiper cowls, mirror caps, and textured bumper trim to restore the factory-fresh contrast of the vehicle.
The Rag Company Eagle Edgeless 500 GSM Microfiber: A premium 500 GSM edgeless microfiber towel with the mass and pile depth to pull moisture and level sealant in a single pass. The higher GSM weight over a standard detailing towel means more absorption per stroke, which is critical when buffing off P&S Bead Maker without leaving streaks or high spots. Edgeless construction keeps clear coat and piano-black trim safe throughout the final buff.
Contact
Questions? Reach out anytime, we’re here.
© 2026. All rights reserved.
Disclosure
The Retrofit Routine is a participant in the Amazon Services LLC Associates Program. As an Amazon Associate, we earn from qualifying purchases at no additional cost to you.
The Retrofit Routine is a digital property owned and operated by Atlantic Delivery Drivers Corp.