Subterranean Moisture Eradication: Systemizing Automated Climate Control
Stop heating dead water. Learn the continuous-drain extraction protocol to permanently strip subterranean humidity and protect your sealed thermal envelope. How to optimize climate control at home?
THE RETROFIT
2 min read
Heating a damp room requires exponentially more energy than heating a dry room. The physics are non-negotiable: before your furnace can raise the ambient air temperature, it must first heat the invisible water vapor suspended in that air.
If you have successfully executed the rim joist lockdown, you have permanently sealed your home's thermal envelope. However, this creates a new structural hazard in legacy architecture. Poured concrete foundations are highly porous, and ground moisture constantly wicks through the walls via hydrostatic pressure. Previously, this moisture escaped through the structural drafts you just sealed. Now, it is trapped, turning your lower level into a humid, freezing microclimate that chokes your HVAC efficiency. This guide outlines the technical protocol for deploying an automated, zero-maintenance moisture extraction system to stabilize your subterranean climate.
Phase 1: The Bucket-Emptying Fallacy (System Diagnostics)
The standard homeowner response to basement humidity is purchasing a standard-capacity dehumidifier and manually emptying the plastic reservoir. This is a logistical failure.
The Downtime Trap: When the internal reservoir fills, the machine triggers an automatic shutoff. While you are at work or sleeping, the system is dead, and the ambient humidity immediately spikes back up, entirely defeating the purpose of the hardware.
Continuous-Drain Necessity: To achieve true climate control and stop the HVAC system from overworking, the extraction hardware must operate on an automated, continuous extraction loop without a single second of human intervention.
Phase 2: The Hardware Deployment (Positioning and Airflow)
Moisture extraction is entirely dependent on ambient airflow. Placing the unit in a dead corner behind storage boxes destroys its efficiency.
Centralized Intake: Position the extraction hardware in the most open area of the lower level, ensuring the intake coils have at least 18 inches of clearance from any structural walls or obstructions.
Auxiliary Circulation: If your basement has isolated rooms or partitioned zones, deploy a high-velocity floor fan to physically push the stagnant, damp air from those dead zones toward the central dehumidifier's intake.
Phase 3: The Automated Bypass (Drainage Logistics)
We do not empty buckets. We engineer a bypass using the unit's continuous-drain port to permanently route extracted water directly into the home's plumbing infrastructure.
The Gravity Feed Protocol: If your hardware is positioned above a floor drain, attach a heavy-duty extraction hose directly to the bypass port and route it to the drain grate. Gravity will continuously pull the water away from the unit.
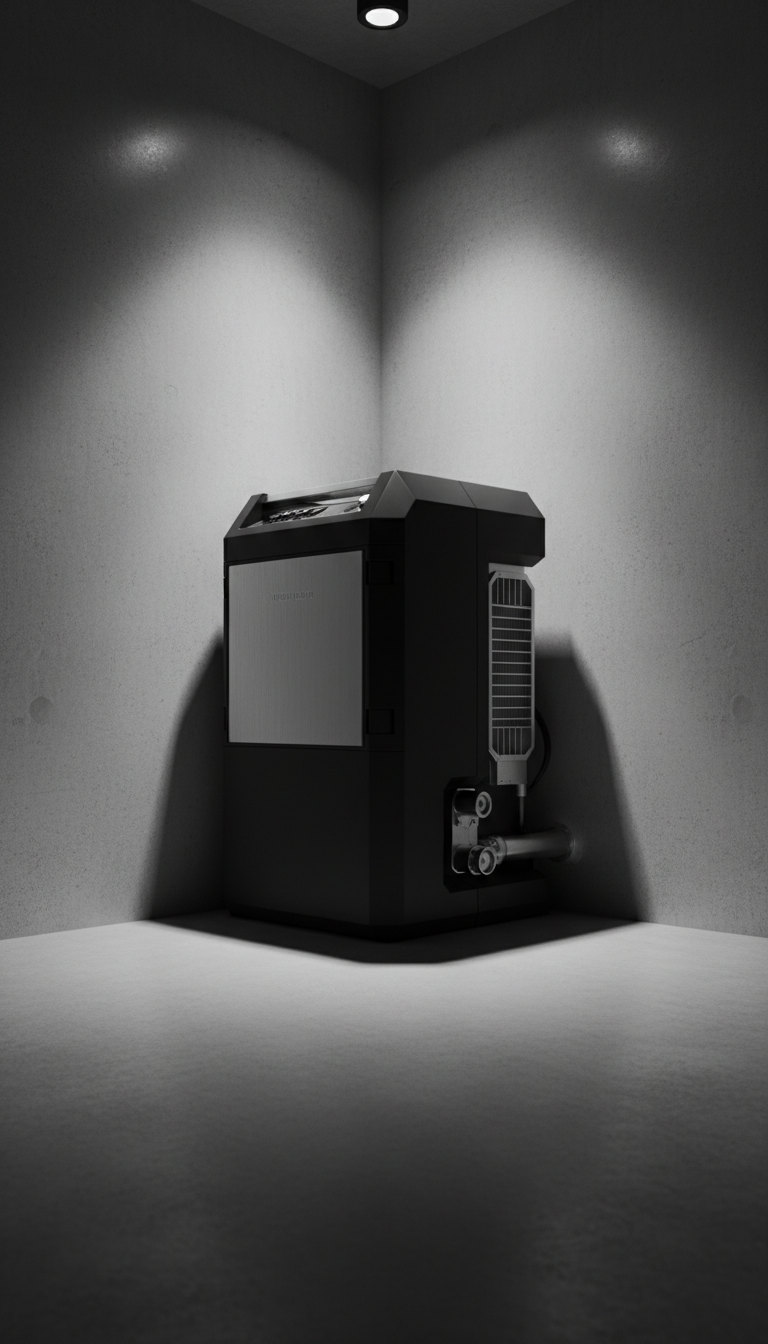
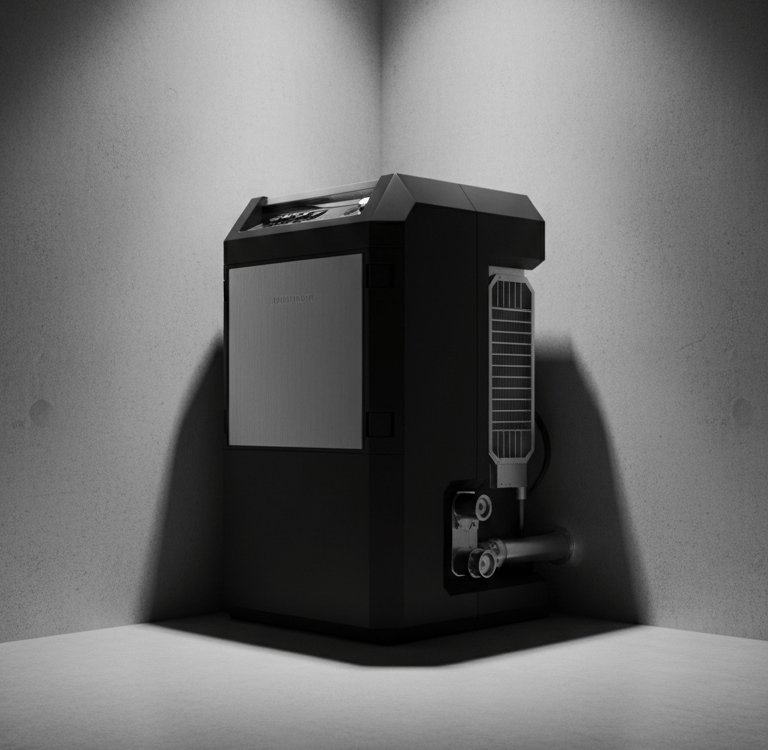
The Vertical Lift (Pump Output): If you are routing the water up and out (into a utility sink, a washing machine standpipe, or a sump pit), you must deploy hardware with an integrated vertical pump to physically force the extracted water against gravity.
The Expert Gear List
To execute this automated extraction protocol, our team utilizes the following commercial-grade materials and hardware on Amazon.
Disclosure: The Retrofit Routine is a participant in the Amazon Services LLC Associates Program. As an Amazon Associate, we earn from qualifying purchases at no additional cost to you.
Extraction Hardware
Midea 50-Pint Cube Dehumidifier with Smart Wi-Fi: High-capacity extraction hardware capable of pulling massive moisture loads out of large subterranean footprints, controllable and monitorable directly from your smartphone.
GE Energy Star 50-Pint Dehumidifier with Built-In Pump: Mandatory heavy-duty hardware if your drainage routing requires pushing water vertically into a sink or out a basement window.
Monitoring & Routing
Govee Wi-Fi Thermometer Hygrometer (2-Pack): Precision atmospheric sensors. Place one near the extractor and one in a dead zone to monitor your baseline humidity drops and thermal balancing in real-time.
Flexzilla Premium 5/8" Garden Hose (Short Lead): Standard PVC dehumidifier hoses crack and kink over time. We swap them for flexible, crush-proof hybrid polymer hoses to ensure a flawless, leak-free gravity feed to your floor drain.
Contact
Questions? Reach out anytime, we’re here.
© 2026. All rights reserved.
Disclosure
The Retrofit Routine is a participant in the Amazon Services LLC Associates Program. As an Amazon Associate, we earn from qualifying purchases at no additional cost to you.
The Retrofit Routine is a digital property owned and operated by Atlantic Delivery Drivers Corp.